Assignment 21A,B&C
This is our first assignment using google sketch. We made 3 shapes, a square triangle and circles then made them 3D. We then wrote our name using the previous tools and made them 3D aswell.
What I've learned in the 2nd marking period...
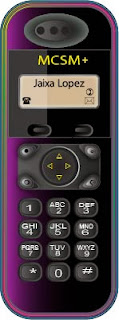
In the 2nd marking period I learned many things. I learned much about the basics of editing of pictures, using Photoshop. I also learned how to use illustrator to make a funky looking wireless phone, and a personalized flash drive. One this we did to a picture was take a picture of someone, then choosing one little part of them to change. (Hair color, eye color, teeth, etc.) We also made the skin of a person (Selfie, or other) luminous and nice. We learned how to make an image seem as though it's moving. We blurred the background of it, and left the moving object untouched. To make the phone and flash drive in illustrator it was a serious of numerous gradients and shape merging/ grouping. This marking period was a success with the important items we learned.
Quiz Block
This is quiz block #9.
4' by 9' by 5'
Blocks 1 - 4
Block 1- 8' by 5' by 5'
Block 2- 5' by 8' by 7'
Block 3- 4' by 9' by 6'
Block 4- 6' by 7' by 4'
Blocks 5 - 8
Block 5- 5' by 5' by 8'
Block 6- 5' by 6' by 8'
Block 7- 5' by 6' by 8'
Block 8- 5' by 7' by 8'
Blocks 9 - 12
Block 9- 4' by 6' by 9'
Block 10- 3' by 6' by 11'
Block 11- 5' by 8' by 6'
Block 12- 4' by 9' by 6'
Gingerbread House
The first 2 images you see are the front and back of the gingerbread house i created in Google SketchUp. I created this gingerbread house as close to the third picture as i could do. The fourth image you see here is when i entered the first image in photo shop and then duplicated the layer twice named one blue, the other red then changed the colors o those layers to blue and red. I moved those layers slightly askew from the original house to get the 3D effect.
Button GIF
To create the glowing button you see above, you first make a few series of ellipses. Then change the second smaller one to give it a metallic appearance. I added the power symbol then duplicated the layer to create the color and glow, after changing the blending options and such i got the red color you see. To make the GIF part of this image i created he animation by using frames of each layer and duplicating them in a pattern.
Toy Showcase
This is my toy showcase room. To make this room, i created a series of rectangles, then altered the perspective to give it a 3D effect. Next i made the lights by making a few ellipses then adding some white shapes under them, i blurred the color a bit to give it the look of being a light shining down on the 3 toys in the room.
(Toys from left to right: Domo Kun stuffed doll, Snoopy stuffed doll, Sock Monkey stuffed doll)
School Brochure


